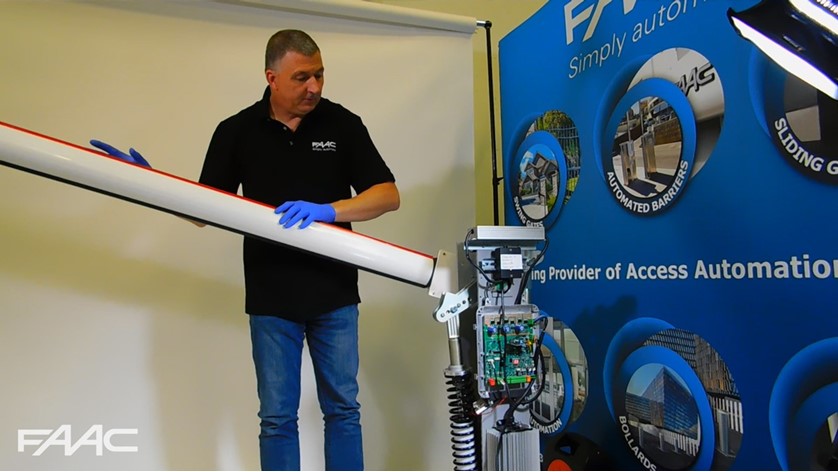
A step-by-step tutorial by Rod Tinker from FAAC Technical Support:
- Balacing the beam
- Checking the oil level
- Control board settings: the CF parameter
- Bleeding the pistons
- How to run a setup (time-learn)
- Running a test-cycle
> Learn more about the FAAC B680H automatic barrier.
VIDEO TRANSCRIPT:
Balancing the Beam
So today I'm going to do a video tutorial on how to balance and bleed a B680H barrier.
The first thing you need to do is in the back of the manual... it's the balancing tables.
The first balancing table, Table 2. is for the small profile beam and black spring. The second table is for the large profile beam and red spring.
So today, because we've got the black spring and a small profile beam, we're gonna be using this table as our reference.
This beam is 4 metres, so we are going to put the pistons in hole position 4 on the rocker arm. Number 1 is the closest to the centre, number 6 is the closest to the outside. Both pistons must be in corresponding holes, or else it will not balance. The threaded collar is loose, so all I need to do now
is to undo the manual release fully: it should be turned anti-clockwise until it stops.
I will now bring the beam down to a fully closed position to check its balance. It drops too easily. So now I'm going to put more pre-load on the top collar. It's very important, that the top collar makes contact with the spring at all times. Otherwise the beam can move, and when it reaches the spring the beam will go into obstacle detection and the barrier beam will reverse.
Ok, so after the collar has been adjusted we will now test it to see if it works.
The beam should be lowered gently and its movement should be smooth. The beam should be stopped and rested in any position. If it springs up, or drops down more load may be required on the spring, or less load. In this case we just need a touch more. We're now trying it again: if I can now raise it using my finger approximately a meter out of the centre, and lower it the same way.
This is now correctly balanced.
Checking the Oil Level
The first thing to do is to re-tighten the manual release. Turn it clockwise, and very lightly nip it up. The next thing to do is to check the oil level. On the unit it has a dipstick; there are two markers indicating top and lower levels. Your oil should sit nicely between these two as it does on this one.
Control Board Settings
Next phase of the process is to set the correct defaults on the Table in the CF function. This is relative to the beam length and profile. Table 4 is for the black springs and small profile beam, Table 5 is for the large spring, which is red, and the large profile beam. In this case, because we have a 4m beam with no accessories CF should be set to 2. Default is always 6. Use the minus button, until 2 is selected.
Carry on pressing the function button, the "F" button until the register "NT" becomes visible, at which point two dashes will be displayed. We're now ready to bleed the barrier.
Bleeding the Barrier
Next phase is to bleed the pistons. To do this, a 3mm Allen key should be inserted into the vent screw on the piston body. The screw can then be released by one turn. In the "NT" function the + button opens the barrier, the - button closes it. So by pressing and releasing the + button this will force oil into that cylinder. Once oil is visible at the vent screw, the vent screw can be re-tightened.
Ok, the next phase is to bring the barrier down to the closed position. I can do this by holding the minus button. That is now fully closed. If I release the vent screw half to one turn oil is coming out. By pressing the minus button I can just check that fluid is being released from the cylinder - which it is.
The screw can now be tightened. And now we're ready to run a setup.
How to Run a Setup (time-learn)
To do this, press the function button once again. "TL" will be displayed. On release, two dashes will appear. The beam must always be in a closed position. To initiate the time learn the + and - buttons need to be held down until the beam starts to move. Once the setup is complete press the "F" button till "00" is displayed. The barrier is now complete. A test cycle can now be run, to check the movement of the beam.
That's now balanced and ready to use. Thank you for watching this tutorial. If you need further assistance help can be found on the FAAC website.
Thank you.
